Before I could test out the logic analyser I had to make use of a
Microduino-Core to generate the DCC signal, as I only have one Arduino Uno board. The
microduino is arduino compatable and uses the
ATmega328P same as the UNO.
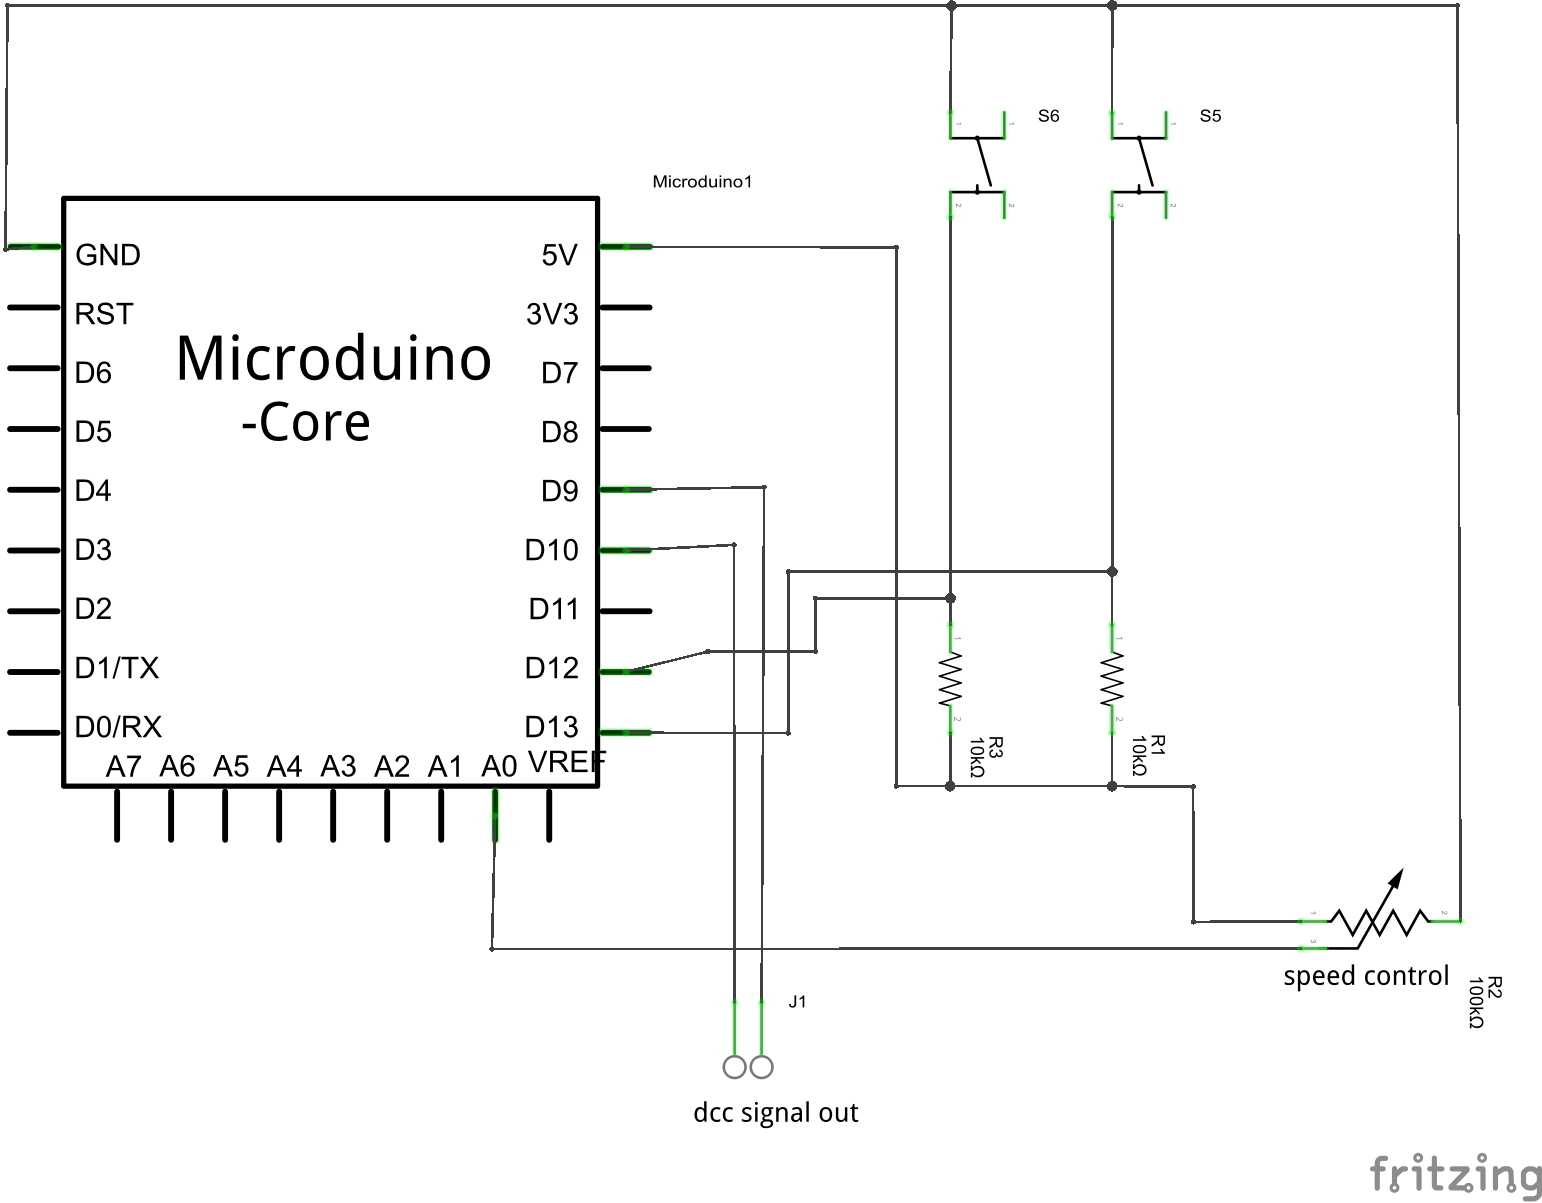
New Fritzing images using the Microduino, fingers crossed that the CmdrArduino files will work with it.
(Updated as incorrectly connected dcc out to ground when it should goto pin 10).
I need to do more testing of the dcc signal to see if CmdrArduino is running correctly on the microduino.
Logic Analyser
The logic analyser works, it supports 4MHz & 2MHz sampling rate. I tried it at 100 kHz sampling rate with the microduino running CmdrArduino, shown below.
There is limited sampling due to the size of memory on the Uno board, but it is useable, I just need to adjust my triggers.
What we are seeing is the idle packet for all decoders which is in the format of:
11111111111111 0 11111111 0 00000000 0 11111111 1
As shown on line 90 of the NMRA Specification
S-9.2 DCC Communication Standard (pdf document).
DCC Monitor
I have put together the dcc monitor and ran it testing the Microduino running CmdrArduino, but with no result, including no idle packets. Looks like dcc monitor cannot handle positive unipolar signal, which is okay as the dcc monitor was designed for trackside which is a bipolar signal. Just means I need to wait until I have my booster before I can test it out.
Correction: CmdrArduino has a differential signal, the example sketch just mentions pin 9, the two pins required are 9 & 10 on Arduino Uno (and microduino).
Update: dcc monitor will work without booster now that I am using pin 10, instead of ground.
Between marker 1 (1.45 ms) and 9 (7.23 ms) is the whole dcc idle packet, with both dcc signals shown - pin 9 in purple and pin 10 in blue.